Price Lists allow you to select the products and options you want to sell in your Print Shop and Online Galleries. You can set up as many price lists as necessary.
Here are a few reasons why you might need more than one!
Print Shop:
• You might like to set different prices for different products. For example you might have a different price list for limited edition prints vs. regular bulk run prints.
• We recommend matching the aspect ratio of your image files to the products you’re selling, so they won't require cropping. It's your Price Lists that determine what products are available for a specific image, so if you set up separate price lists for 3:2 (full frame), 4:3 and "A" aspect ratios — for example — you could could offer different products (e.g. 36x24, 40x30 and A1 prints, frames and canvases respectively) to suit each image.
Client Galleries:
• As well as the aspect ratio issues mentioned above, you might also need different price lists for different genres. For example weddings, family and commercial. Or for your Print Shop!
Here is how to build a Price List in Workspace
There are four steps involved in setting up a basic price list; setting your basic parameters for the price list, choosing the products you offer, setting prices, and linking the price list to the image gallery/ or print shop.
Step 1. Create your first price list
Log in to your Workspace dashboard, click "Settings" in the main navigation. On the left hand side you'll see a sub-heading "Your Shopping Cart" beneath this. Click the "Price List" link. Once on the Price List page, click the button "Create Price List".
Step 2. Set your basic parameters
Workspace will ask you a series of questions, related to this price list, for example if you'd like the images colour corrected by Queensberry after you've made a sale. Complete these questions then click the button "Continue to Select Products".
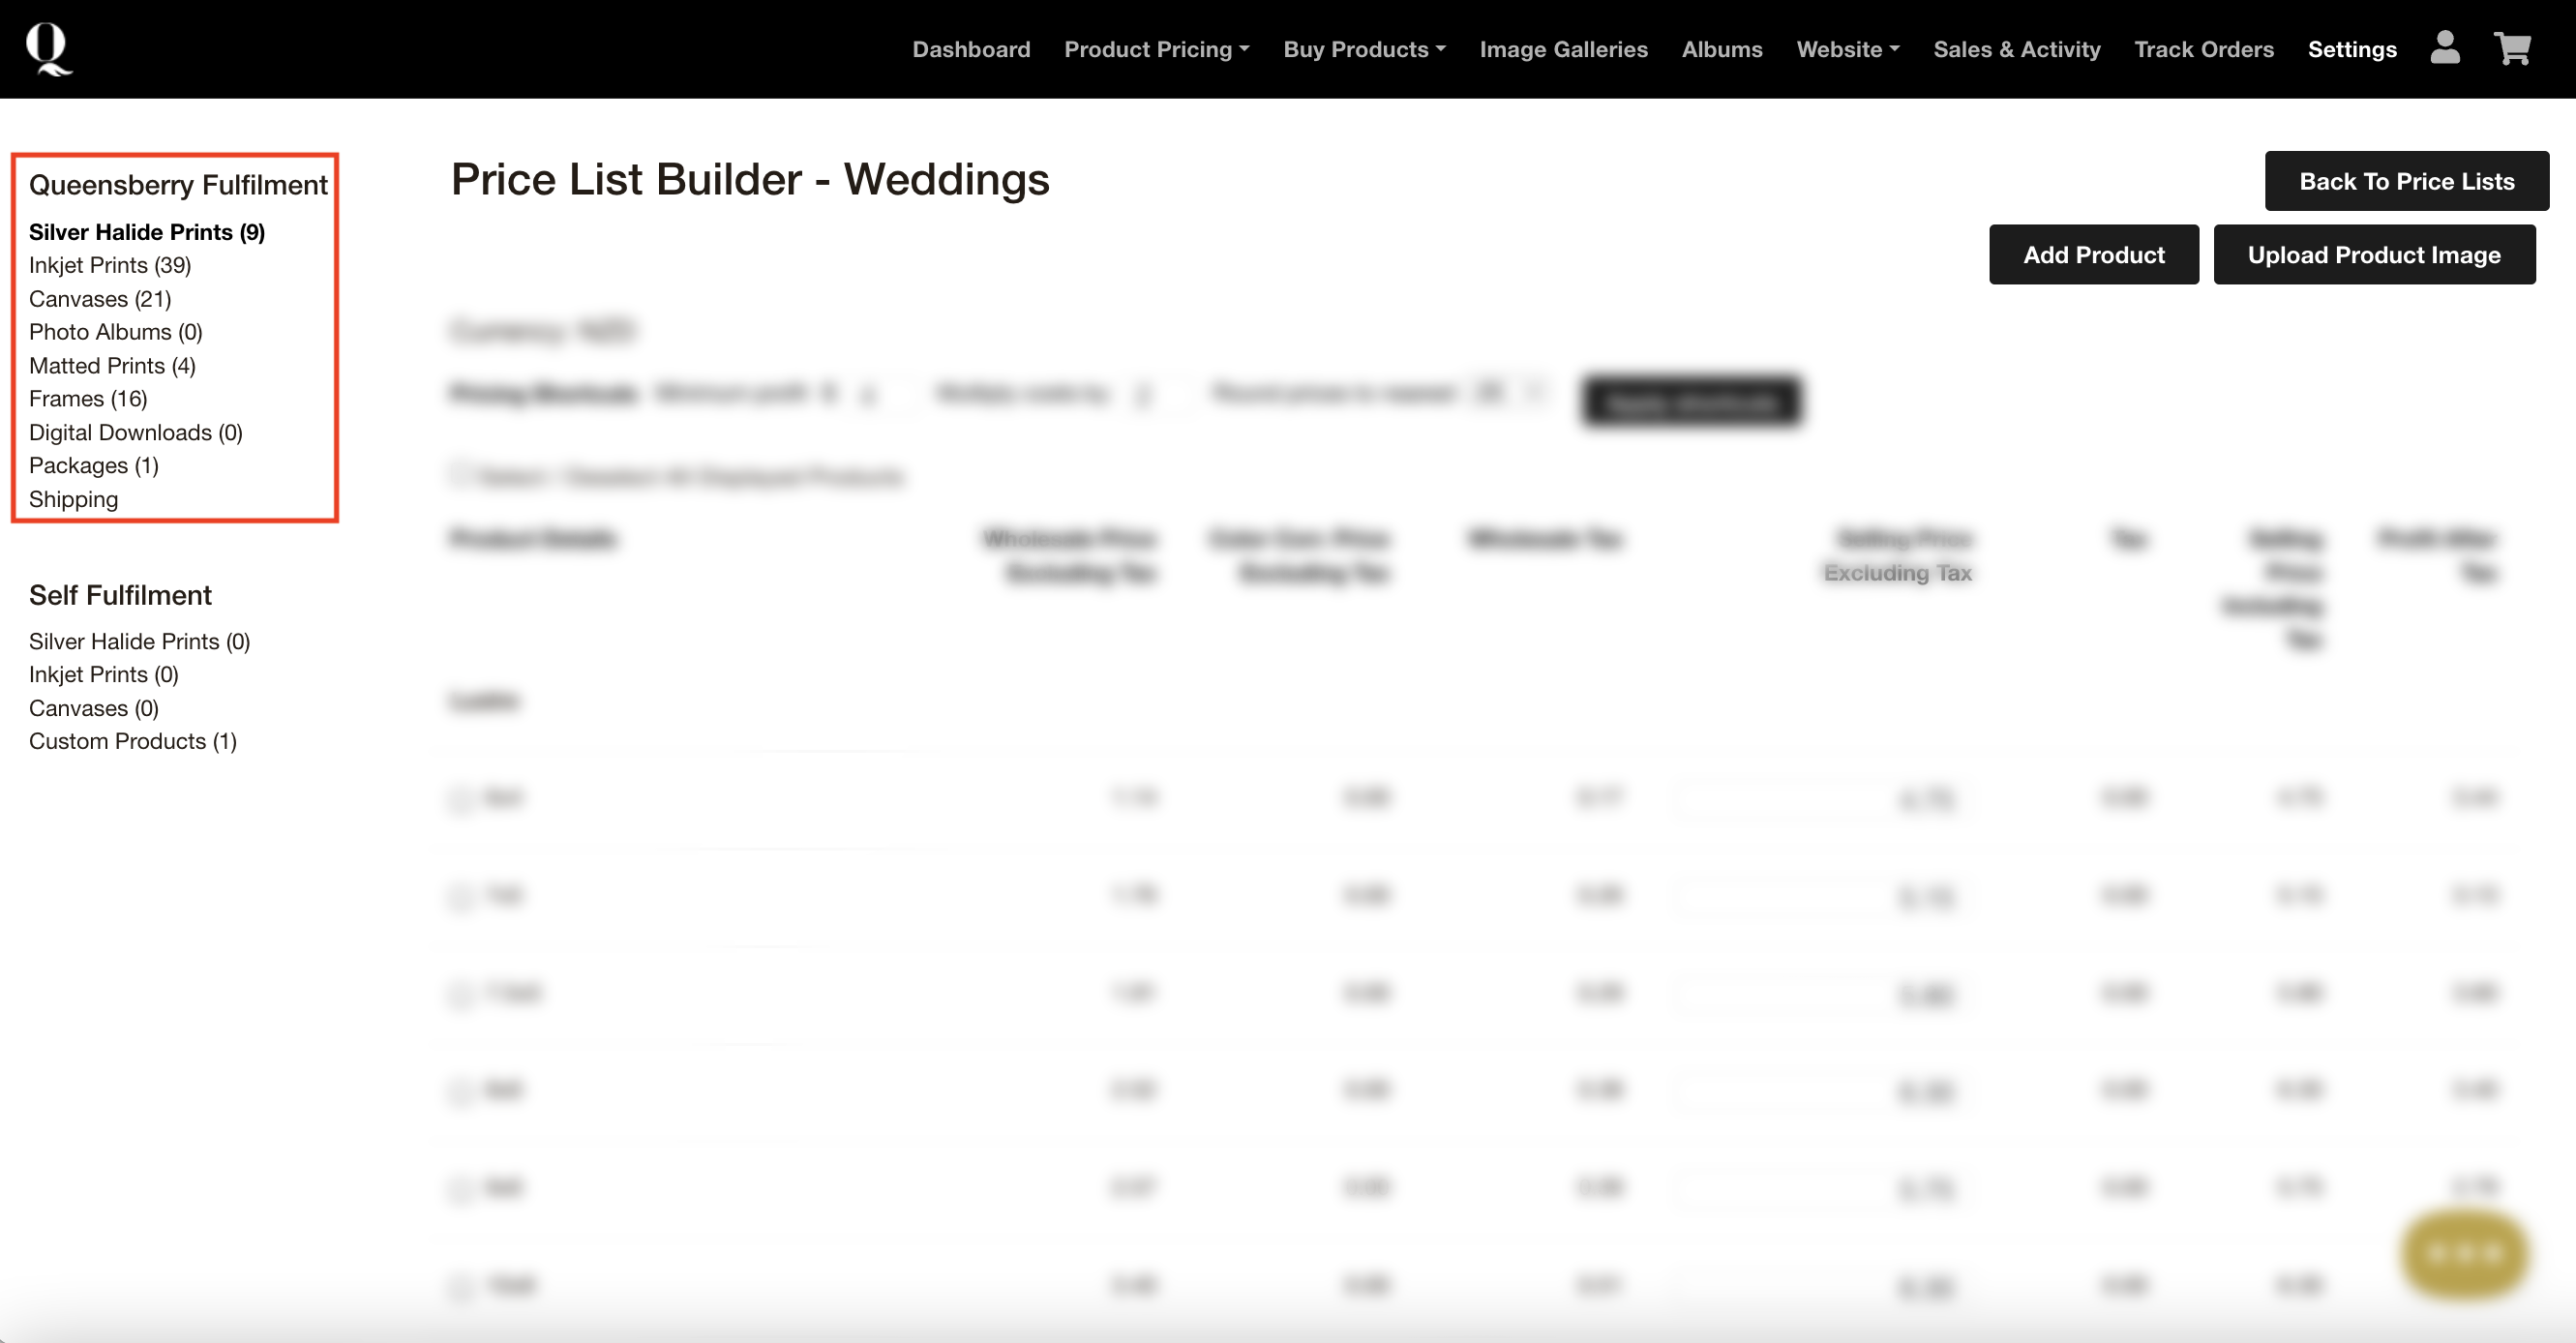
Step 3. Select the products you'd like to offer
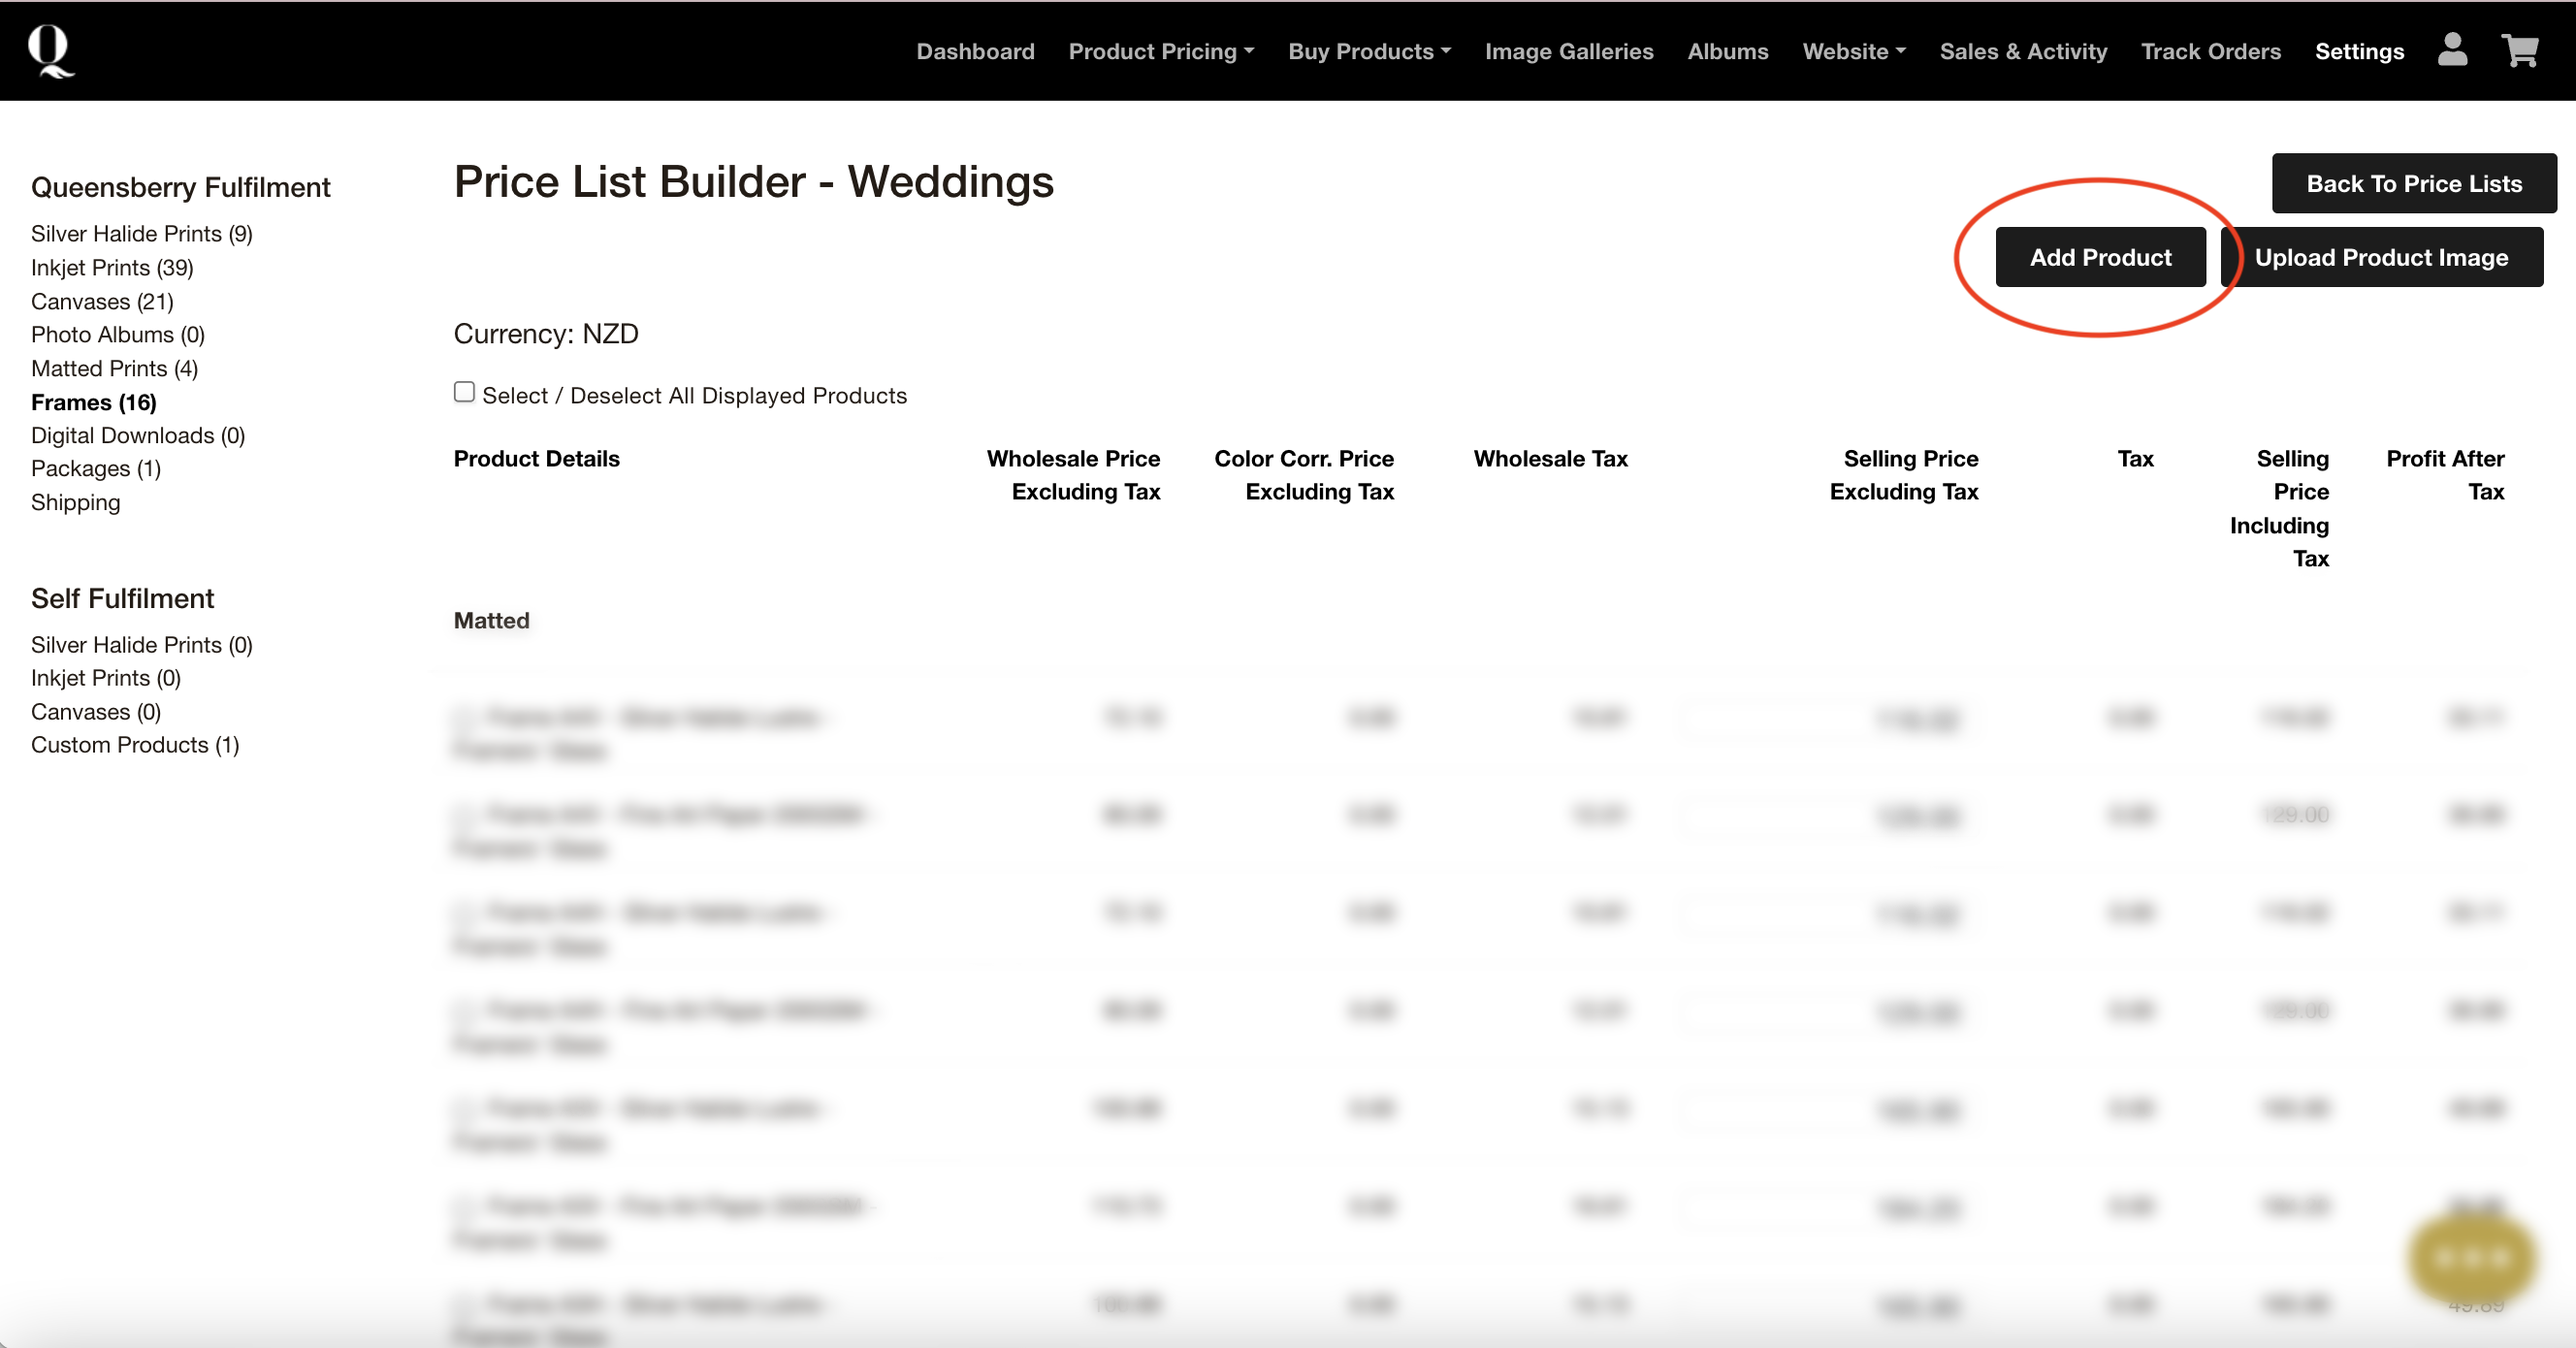
Now it is time to select the product you wish to offer within this price list. On the left hand side you'll see a list of product categories e.g. prints, frames, canvases and downloads. Click on each product category and select the sizes you wish to offer.
Step 4. Set your prices
Once you've selected the products, scroll to the bottom of the page and click the button in the bottom right hand corner that says "Continue to Set Prices." Now toggle between each product category and adjust the selling price. Once complete click "Take me back to Price Lists" — you're all done!
Step 5. Connect this Price List to a Gallery or Print Shop
Now that you've created this Price List you'll be able to connect to it when setting up a new client gallery or print shop.
After creating a new Gallery or Print Shop, simply click the Gear icon in the top right hand corner and scroll down to where it asks you which price list you'd like to attach to it.
If you have any further questions about building a Price List in Workspace, please email info@queensberry.com, we are more than happy to help, we can even do the set up for you!
How to add products to an existing price list:
1. Open your price list in Workspace
2. Navigate to the product group you would like to add a new product to. E.g. if you would like to offer a new frame size, click frames
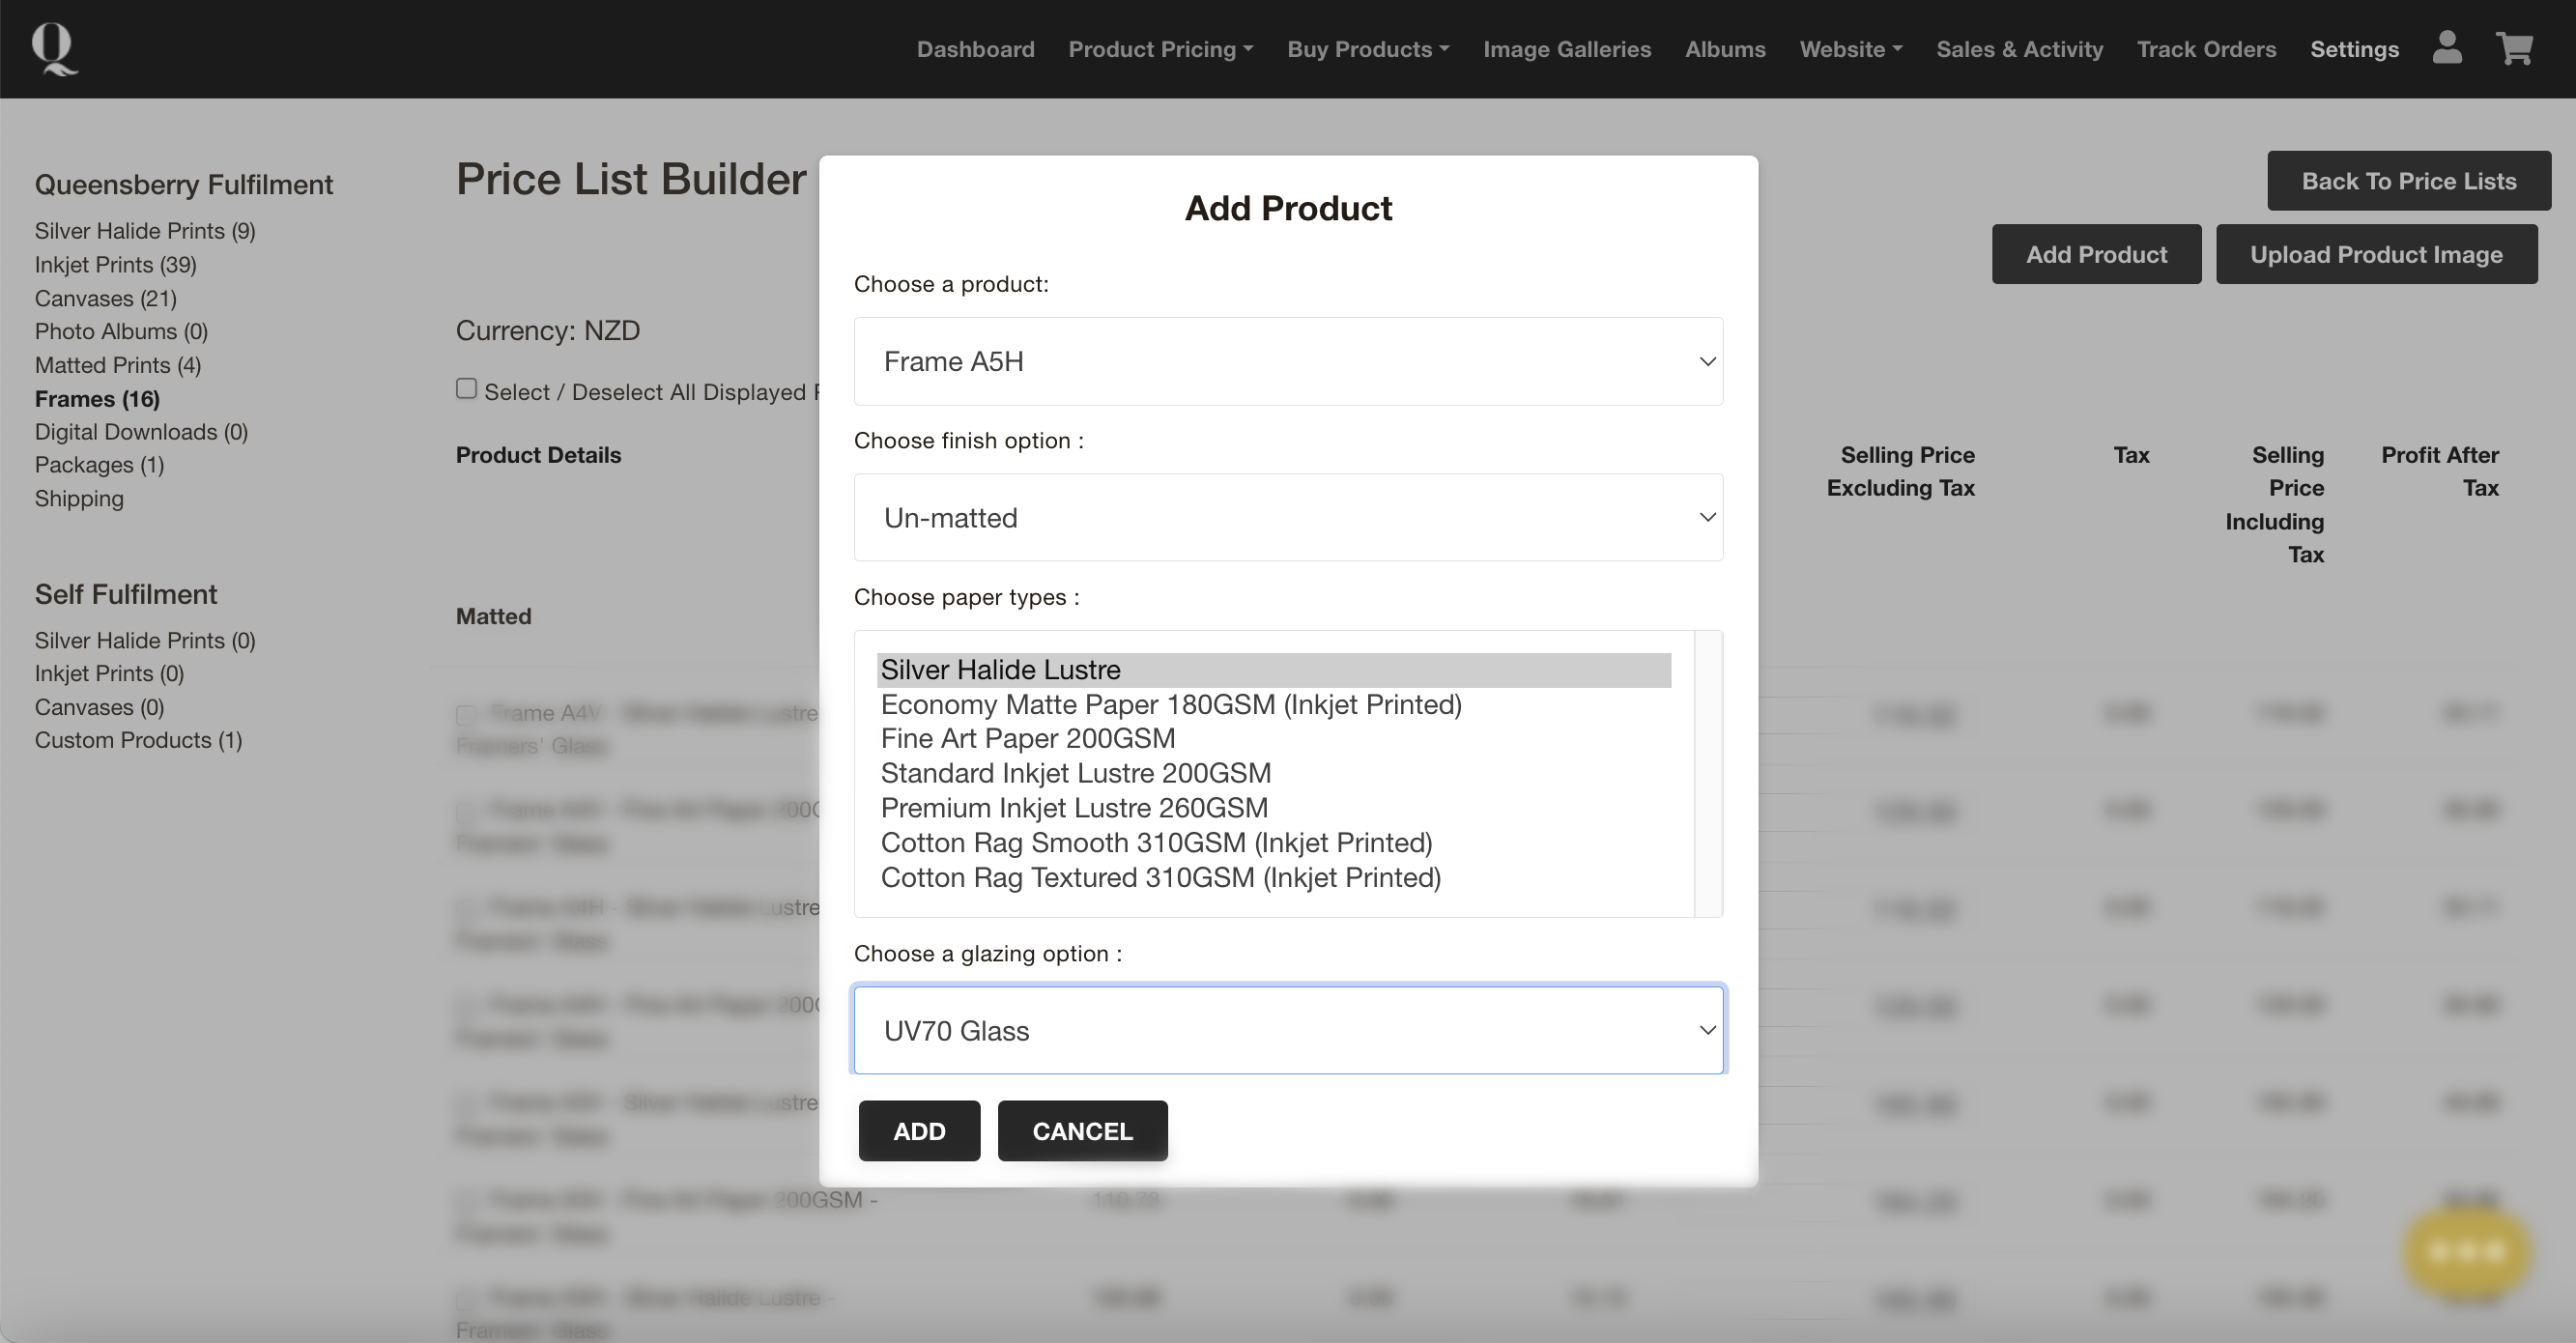
3. Click add product
4. Enter all of your particulars and click add product
5. Update your pricing
Alexandria
Comments